Moving From Medium to Hugo
Medium mostly served me well for the five or so years that I used it, but recently I’ve had a desire to take back control over my content. Friends have been leaving medium for substack, but that’s yet another platform where you don’t actually have control over what you produce. After an extremely bad interaction with medium customer support, I finally took the plunge and moved all of my content to my own website at sbuss.dev.
In this post I’ll walk you through the process of setting up a new Hugo-powered website, using medium-to-hugo to automatically export your content from medium to hugo-compatible markdown files, and deploying the final product with netlify.
This tutorial should work on windows, mac, and linux — assuming you’re comfortable using command-line tools.
Export your data from Medium
Exporting your data from Medium can take some time, so let’s start it and let it run while we work on the next steps.
- Go to your medium settings
- Scroll down to “Download your information”

- Click “Download.zip”
- Click “Export”
This will kick off a job on medium’s servers and you will get an email when it’s done with a link to the zip.
Set up hugo
Hugo is a static site generator, meaning that it transforms simple text files into a website that can be hosted almost anywhere for little to no cost. In fact, you can host your website for free on render.com or netlify. I have used both services and found that render.com is simpler to use but lacks some features more advanced users might want (like 301 redirects), and netlify is a little more complex but also more feature-full.
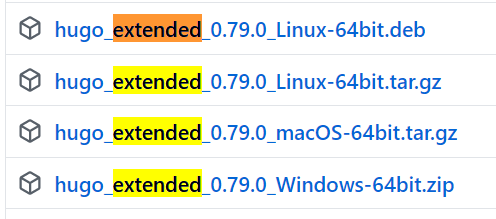
First, follow the instructions to install hugo. I strongly recommend following the “Binary (cross-platform)” instructions and installing the “extended” version since you will occasionally run into features you can’t use without it.
Initialize your new website
Follow the hugo quickstart guide to create your new website. Use all of the defaults for now; you can worry about customizing your theme later!
The quickstart will show you how to create new blog posts
(hugo new posts/my-first-post.md), run the hugo server (hugo server -D),
and set basic configuration in hugo’s config.toml.
Use medium-to-hugo to import your medium posts
Now the cool part.
By now, you should have gotten an email from Medium that your data is ready to download. Go download that zip file.
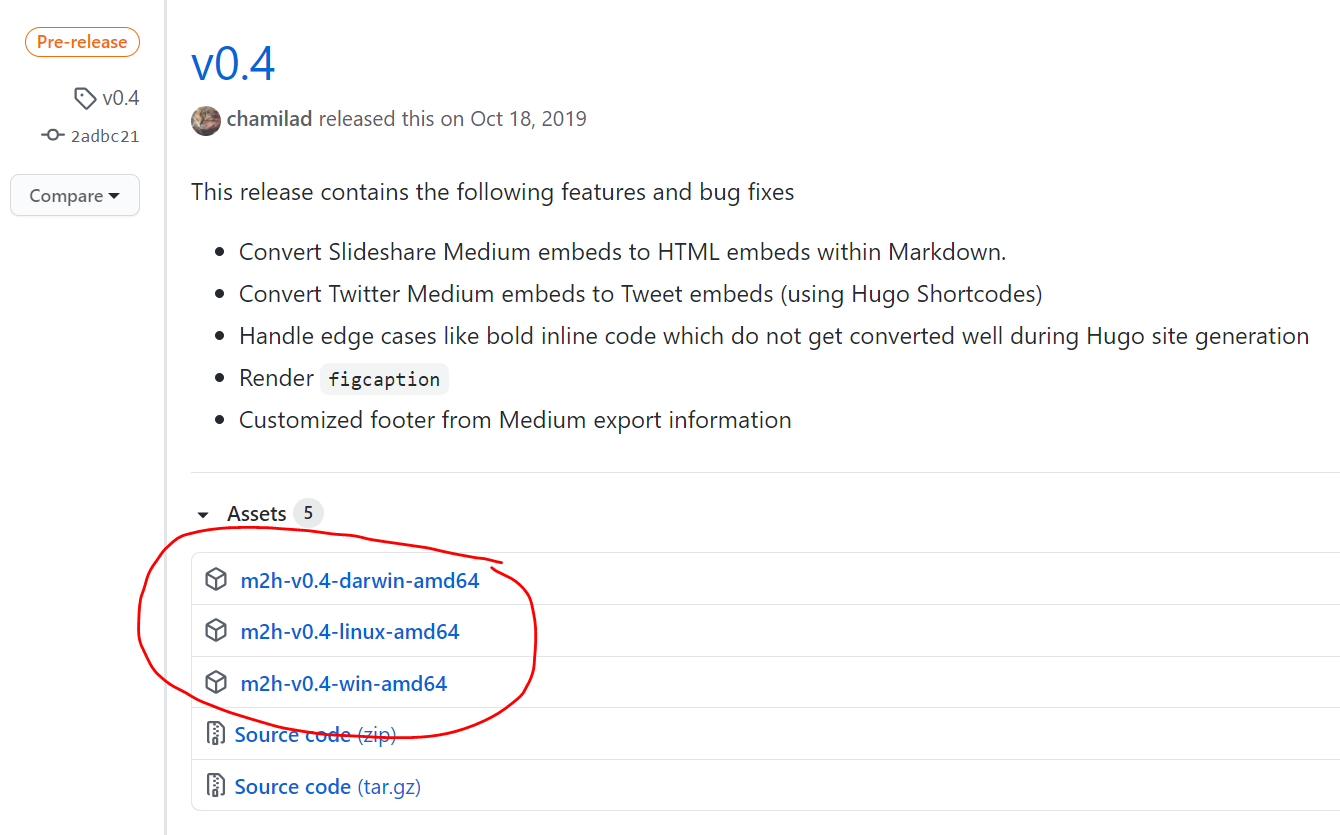
Install m2h
Next, download the latest release of medium-to-hugo.
After downloading the correct file for your system, you should rename it. On
windows, you should rename the file to m2h.exe; on linux and mac just rename
it to m2h.
Run it
Run the medium-to-hugo program on your medium-export zip file:
cd ~/Downloads
./m2h -f ./medium-export.zip
This will take a minute or two and write a bunch of files to a new directory
named medium-to-hugo_YYYYMMDD-HHmm/out, with the current date and time. All
you need to do now is copy the out/post directory to your new website, eg:
cp -R medium-to-hugo_20201127_1528/out/post /path/to/website/content/post
This will leave you with a directory that looks something like this:
content/
├── post
│   ├── 2015-12-07_first-post.md
│   ├── 2019-08-22_some-other-post.md
│   ├── 2019-10-17_foo-bar.md
│   └── img
└── posts
    └── my-first-post.md  # This file was created in the hugo quickstart
I need to point out that medium-to-hugo assumes your website has a directory
named post, while the quickstart uses posts. Hugo actually handles this
fine, and will show content from both directories.
post directory, or move the files to a different
directory, your images will break because they hard-code post in the path.
Fix the bugs
Now that your files are all in place, try to start your server!
hugo server -D
If you’re lucky, it will Just Work (TM). If not, it’s time to fix whatever bugs hugo reports. For instance, when I imported my medium posts to this website, I got this error:
Error: Error building site: "/home/sbuss/workspace/website/content/posts/2020-02-07_pissed-off-at-the-pissed-off-voter-guide.md:90:30": unrecognized character in shortcode action: U+003F '?'. Note: Parameters with non-alphanumeric args must be quoted
This may look confusing, but when I open the file to line 90 (as indicated by
the :90 in the error message), I see {{< tweet 1213985770148548608?s=20 >}}.
Fixing this error is as simple as removing ?s=20, an annoying (useless?)
parameter that twitter appends to links to tweets.
After removing that, I can run hugo server -D without error and all of my
medium content is there!
Improve the presentation
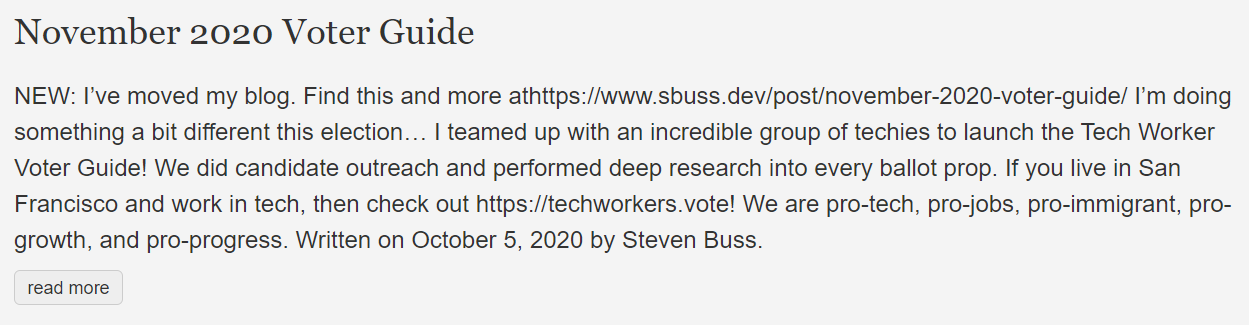
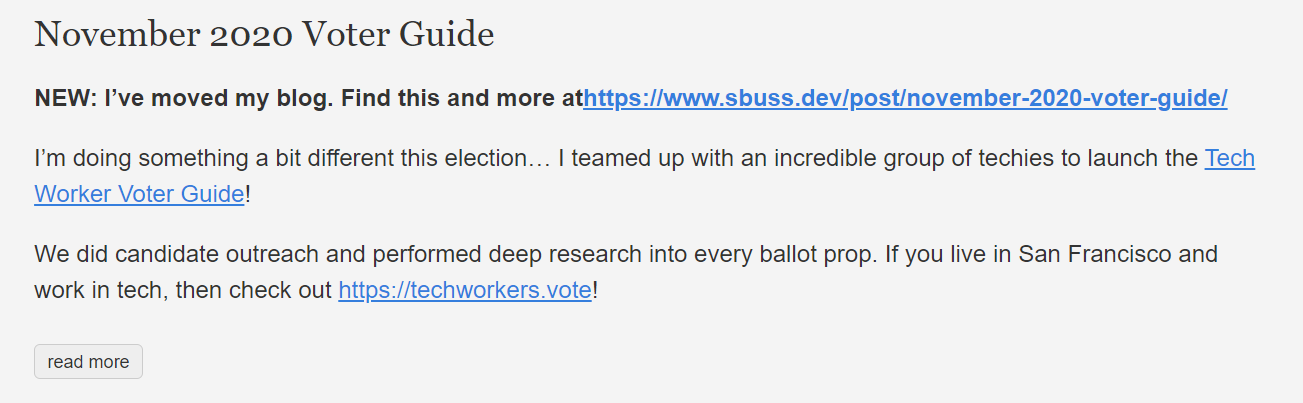
The first thing I noticed was that the article previews didn’t look right. Not only did they not render the markdown (so links and bold text didn’t work), but they were too short, and sometimes the preview didn’t include everything I wanted to show. For example:
I solved this by manually choosing a breakpoint by inserting the magic html
<!--more--> in all of my blog posts. Put that string wherever you want
hugo to clip the preview text. Not only does this let you choose exactly how
much to show in the preview, it also forces hugo to render the markdown:
You’ll also need to fix a few formatting errors, like spaces surrounding links and bulleted lists.
Useful snippets
Hugo has support for “shortcodes”, which are reusable tools you can use in
your content. There are a few shortcodes that will help make your new website
look similar to your old medium site. Put these files in the
layouts/shortcodes directory (you should create it if it doesn’t exist):
Alert box
This adds support for bootstrap-style alert boxes like this:
Put this in layouts/shortcodes/alert.html:
<div class="alert alert-{{ .Get 0 }}">
{{ .Inner | markdownify }}
</div>
Now you can use it like this:
{{<alert "warning">}}WARNING: This feature is super cool{{</alert>}}
The string parameter ("warning", above) also accepts all of the other
bootstrap alert styles.
Pull quote
Medium has support for nice looking pull quotes, ie a snippet of text from your article that you make bigger to draw attention to it, like this:
Pull quotes draw attention
Add support by putting this code in layouts/shortcodes/pullquote.html:
<blockquote class="pullquote">
  <p class="mb-0">{{ .Inner | markdownify }}</p>
</blockquote>
And use it like this:
{{<pullquote>}}Pull quotes draw attention{{</pullquote>}}
Block quote
Finally, add support for nice-looking block quotes with source attribution like this:
Inclusive economic and political institutions do not emerge by themselves. They are often the outcome of significant conflict between elites resisting economic growth and political change and those wishing to limit the economic and political power of existing elites.
Add this code to layouts/shortcodes/blockquote.html:
<blockquote class="blockquote">
  <p class="mb-0">{{ .Inner | markdownify }}</p>
  <footer class="blockquote-footer pb-0 mb-0"><a href="{{ .Get "source_url" }}">{{ .Get "source_text" }}</a></footer>
</blockquote>
And use it like this:
{{<blockquote
    source_url="https://www.amazon.com/Why-Nations-Fail-Origins-Prosperity/dp/0307719227"
    source_text="Daron Acemoğlu and James Robinson, Why Nations Fail">}}
Inclusive economic and political institutions do not emerge by themselves. They
are often the outcome of significant conflict between elites resisting economic
growth and political change and those wishing to limit the economic and
political power of existing elites.
{{</blockquote>}}
Deploy to netlify
After you’ve fixed all the bugs and spiffed-up your theme, it’s time to deploy your new website. Sign up for a free account at netlify. I used github to sign in, since my website is hosted in a github private repo and I want to auto-deploy it when I make any changes.
Add this netlify.toml file to your website to make setting up netlify quick
and mostly automatic:
[build]
  publish = "public"
  command = "hugo --gc --minify"

[build.environment]
  HUGO_VERSION = "0.79.0"
Once you’re signed up, click “New site from Git” to set up a github deployment pipeline.
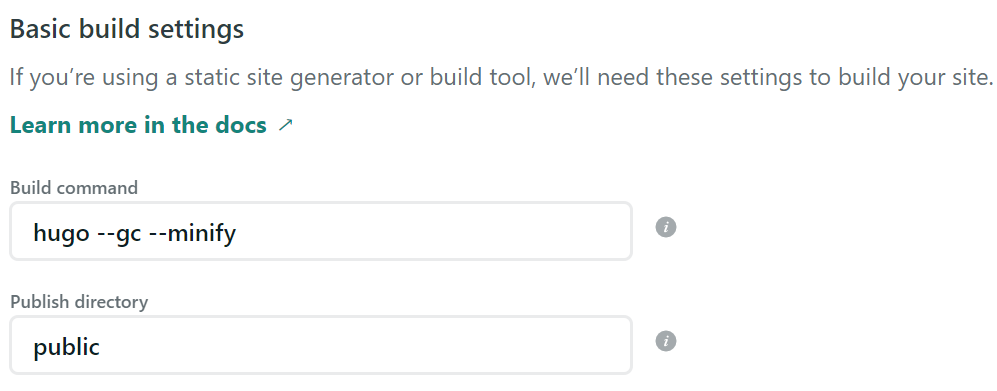
If you added the above netlify.toml file to your website, the Build command
and Publish directory form fields should already show the correct values:
Click ‘Deploy site’ and in a few seconds netlify will have your website online!
Configure netlify for your custom domain
Presumably, you have a domain name you want to use for your website. At this point, I will leave you with the netlify docs for setting up a custom domain.
You’re done!
Congrats on exporting your medium articles to your own website. You are in total control and never have to worry about medium shutting down your account or suddenly changing the rules of the game.
Look out for a follow-up post that details how to backup a squarespace website to static html.